


But there are of course many other ways you can colour in
your stamped images, so I thought I’d share a few of them today.
Before you stamp your image, give some thought to which ink
you should be using – different inks suit different mediums. Because I am working with water-based
inks here, and using water as well, I am using Ranger Archival Ink. This gives a clear image, but most
importantly it is waterproof, so the image will not bleed with any of the below
techniques.
Scrap-n-Crop.com sell a wide range of pens, and all of these can
be used for colouring in. Perhaps the most popular at the moment are the Ranger
distress markers, partly because they match the rest of the distress palette,
and partly because they react so well with water to give different effects.

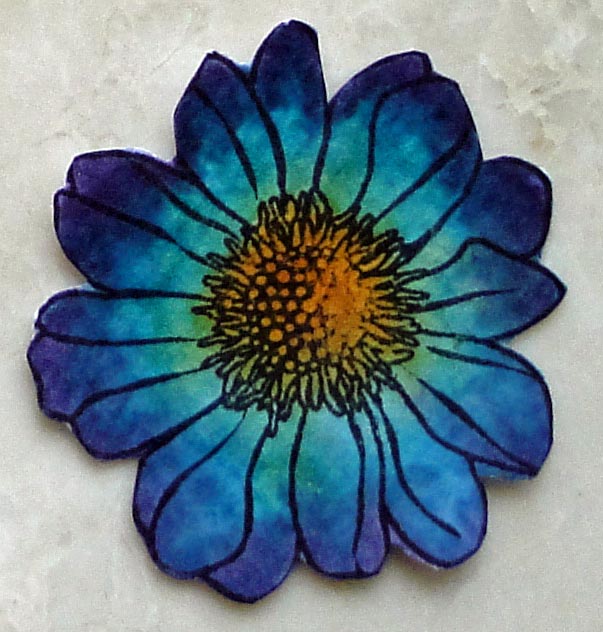
In the first two photos, I have used the same colours for
both images - Spiced Marmalade and Wild Honey for the flower centre, and
Tumbled Glass, Broken China and Dusty Concorde for the petals.
The markers give quite a dark shade of colour, and it can be
worth testing them on a piece of scrap paper first, especially if you are more
used to using the colours from the ink pads.
In the first photo, I coloured the image, and then used a
watercolour brush to go over it. (You could also use a normal paintbrush with
water.) In the second, I coloured it in the same way, but then sprayed it
generously with water. For both of these methods, the water enables the inks to
blend more. The first way gives
more control over your finish, the second gives very little control at all, but
that's part of the fun!


In the third photo, I have used distress inks again, but
this time I have swiped an ink pad onto my crafting mat, and picked up the
colour with my watercolour brush, then brushed it onto the image, again enabling
the ink to blend. You can see
that, although I have used exactly the same colours, the effect is much
lighter.

Finally, in the fourth photo I wanted to show you what
effect watercolour pencils give. You can buy these in most stationery shops,
but a lot of people don't realise that you can use them with water. I chose
colours that were similar to the distress inks I used for the other flowers. I
simply coloured in with the pencils, then went over the image with my
watercolour brush. You’ll be
surprised at the difference a little water can make when using these pencils!
Of course, you don't have to stick to inks and pencils when
colouring - you can use pretty much anything. Sprays, such as the ones from
Dyan Reaveley, can be sprayed onto a craft mat and picked up with a brush, and
of course you can also use all different kinds of paints.
- - - - - - - - - - - - - - - - - -
HINTS!!! {hot tips}
- - - - - - - - - - - - - - - - - -
If
you plan to use water as part of your colouring technique, you will get a
better result if you use watercolour paper. It absorbs the water well, making
it much easier to blend colours while avoiding unwanted puddles of water.


No comments:
Post a Comment