


.

.
- - - - - - - - - - - - - - - - - - - - - - - - - - - - - - - -


All Things Distress
Part 3
Distress Inks, and why they are so special
.
- - - - - - - - - - - - - - - - - - - - - - - - - - - - - - - -
It’s now week three of our All Things Distress series, and I hope you have been able to play and get your fingers inky! I really enjoy learning and trying out new techniques, but I must confess I don’t always find it that easy to put those techniques to use when creating something, such as a card or a scrapbook page.
So, in case some of you love the looks you can achieve with the first two distress methods I have shown you, but aren’t sure what to do with them, here is a quick project to get your creative juices flowing.
This uses the simple blending technique that I showed you in week one to create a card. It also uses heat embossing. If you haven’t done this before, don’t worry, it is something I will be covering at some point in the future.
I love how easy it is to create such a fantastic effect with this technique – it looks as if you have spent hours on it, when really it only takes a few minutes!
.
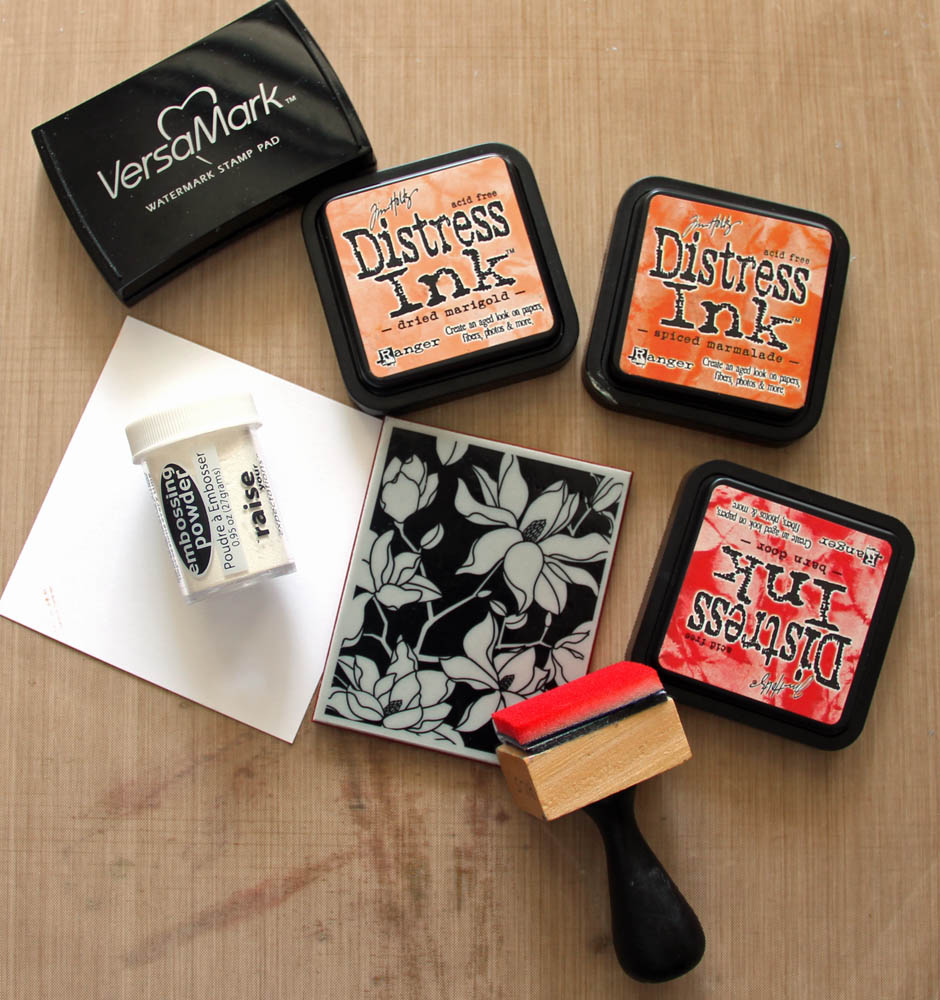
What Do You Need?
.
.
Some cardstock – white to make the card base and the centre panel, coloured for matting and layering.
Distress inks – I have used Dried Marigold, Spiced Marmalade and Barn Door.
Ink blending tool and foam.
White embossing powder.
Embossing ink, clear or white. I have used Versamark – it is one of my favourite embossing inks because it is nice and sticky, so holds the powder well.
A stamp. Mine is from Hero Arts, and stamps the negative of the design, ie the bits around the flower rather than the flower itself. But you could just as easily use a stamp with a positive design, and use your inks to create a coloured background.
A heat tool.
{Items can be purchased at Scrap-n-Crop.com HERE}
.
Instructions:
.

.
.Take a piece of smooth white card that is a little bigger than your stamp. Ink the stamp up with your embossing ink, and stamp onto the card.
Cover the stamped image with white embossing powder, and gently shake off any excess. (Don’t forget you can put this excess back into the jar for using again.).
Heat with your heat tool until the entire image is embossed.
Trim the image to the required size.

Using your distress inks and blending tool, blend the lightest colour over the tag, using the method described in Part 1.
.

.
Blend the second and third inks onto the paper, going as far in as you want to. I started with Dried Marigold, then took the Spiced Marmalade about two thirds of the way in. Barn door was blended around the edges.
.

.
Assemble your card. My card here is A6 size (A5 folded in half). I have mounted my stamped image with black, leaving just a thin margin, to make the image “pop”. I have then mounted it on a piece of orange card that is just a little smaller than the card base. As a finishing touch, I have added some white ribbon.
.
- - - - - - - - - - - - - - - - - - - - - - - - - - - - - - - -
.
Next week I’ll show you how you can use the blending technique together with distress ink stamping to create an embellishment or journaling card for your scrapbooking layouts.
.
.
- - - - - - - - - - - -
Handy tip
- - - - - - - - - - - -
Inky fingers? Wash them with some cheap shampoo, it should get most of the colour out.
.
.
.


No comments:
Post a Comment